This post is also available in: Português
Welcome to the guide on how to create your first email signature using Bybrand.
We offer an easy-to-use platform to design, edit and implement a professional email signature effortlessly. This tutorial will guide you through the entire process, from the creation of the first signature to editing and using it in your email client.
Let’s get started!
Creating from a template
First, click the Signatures tab in the main menu. Click the Create new button to start creating your email signature. Or directly in the Dashboard, in the Create from a template link.

Templates
You will see a list of pre-created templates. Browse the list and select the one that best suits your needs. Click Choose this to choose your template.
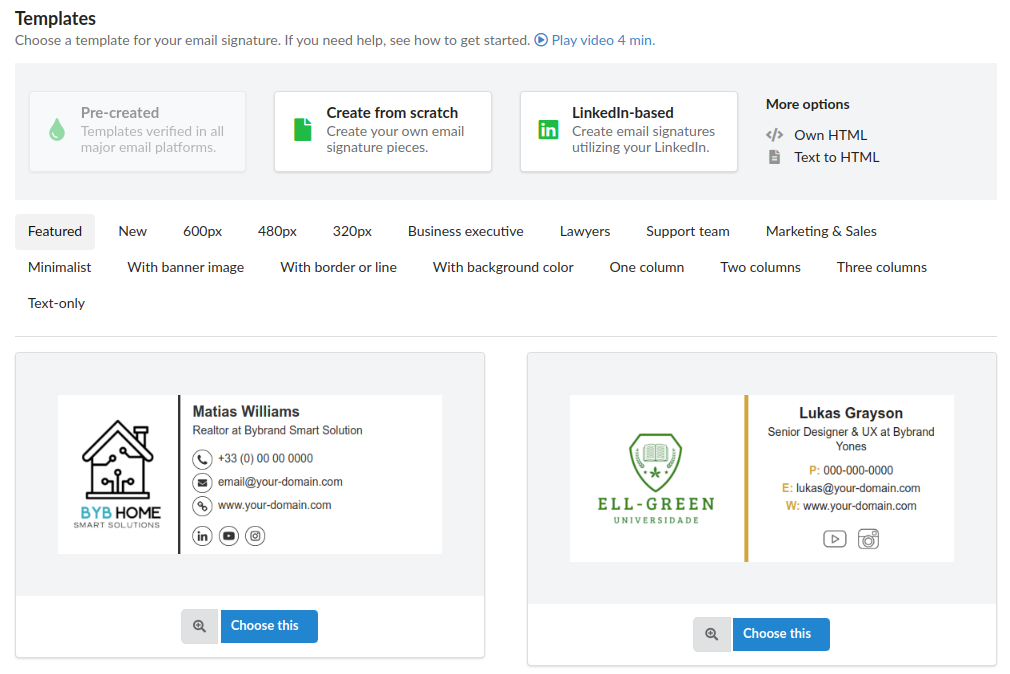
After selecting your template, proceed to edit the personal information. This includes adding your name, job title, contact information and any other relevant details.
Editing the email signature
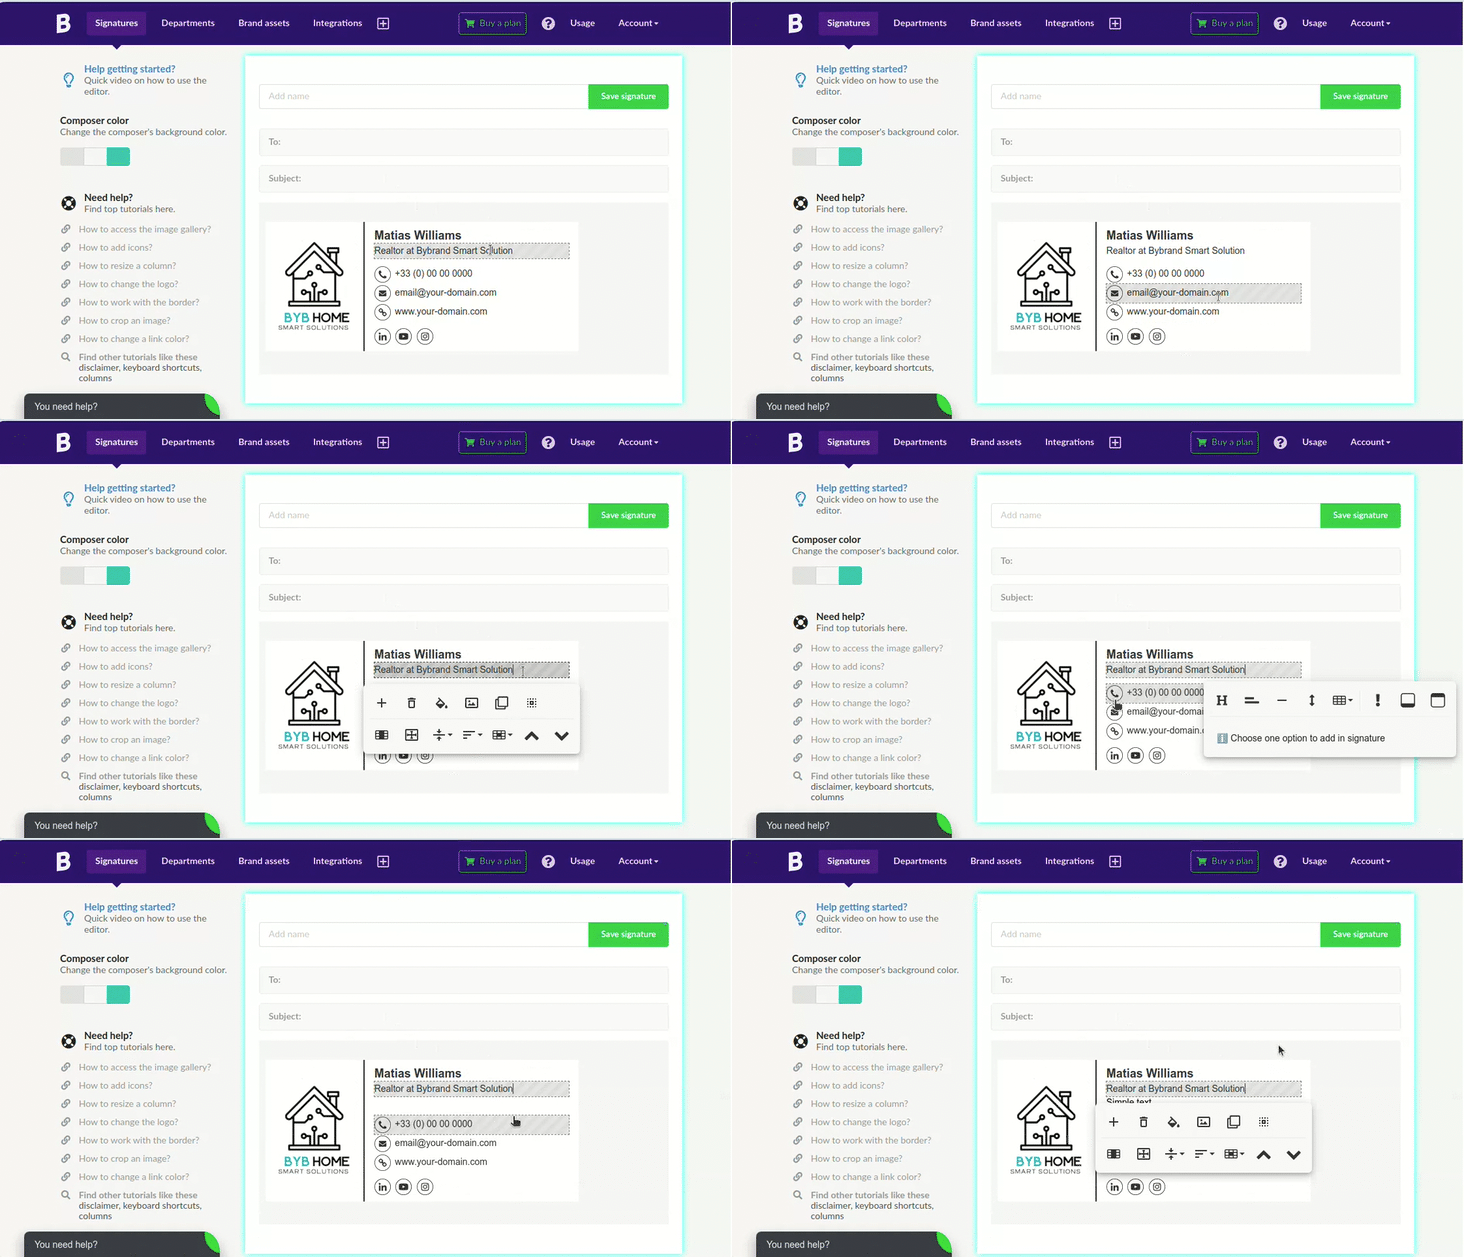
- Turn on the toolbar: Click any part of the signature text or image to activate the toolbar.
- Customizing text: You can also select the text content to customize the type, font, or size.
Add or remove elements
Use the toolbar to add new row, space, columns, or disclaimers by clicking on the (+) button. If you need to remove an element, click the Trash button.
Read also: Exploring email signature editor basic options;
Save the signature
When you are satisfied with your edits, save the email signature with a name to facilitate later identification. Click on the green Save signature button.
Extras
Sending a test by email
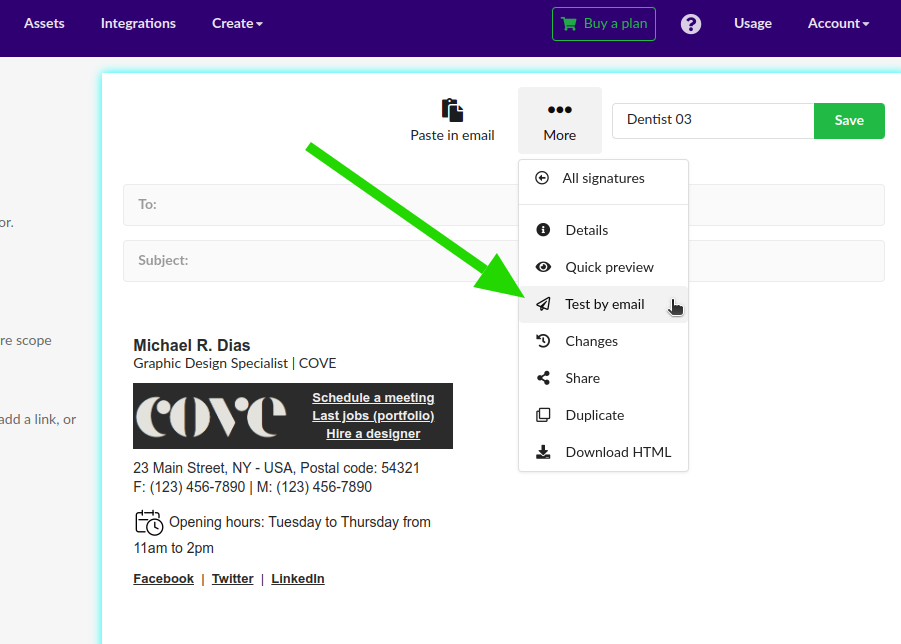
It’s a good idea to send a test email to ensure that the signature appears as expected. Click on the Test button.
There are two types of tests:
- Using an email: Enter the email address to which you want to send the test email;
- Quick preview: click the button to see the signature in different sizes;
Cloning the current email signature
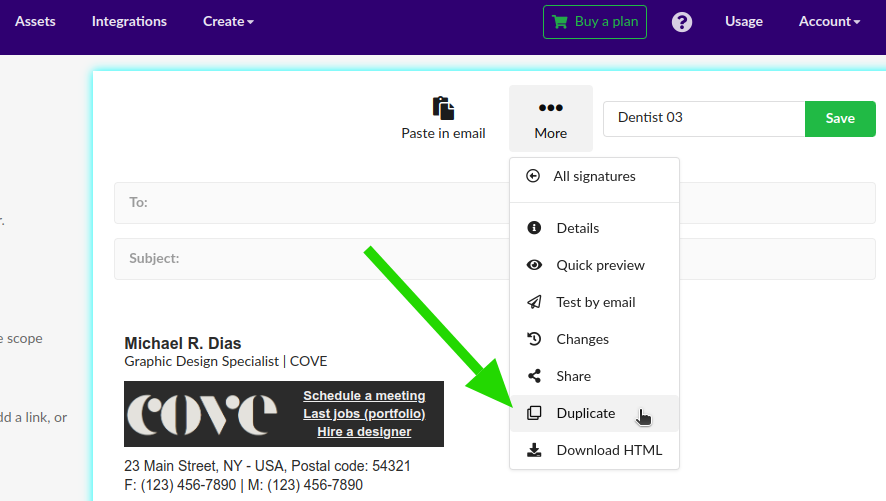
To create a new signature identical to your current one, click on the Duplicate button. You can now edit the cloned signature as needed, saving time by not starting from scratch.
In addition to the above information, you can improve email signature with these other quick tutorials:
- Lines: How to add or remove in an email signature;
- Icons: How to add or remove;
- How to add a logo to your email signature;
Using the email signature
Once your signature is finished, copy it to the clipboard. Click Paste in the email to be directed to the signature usage page.
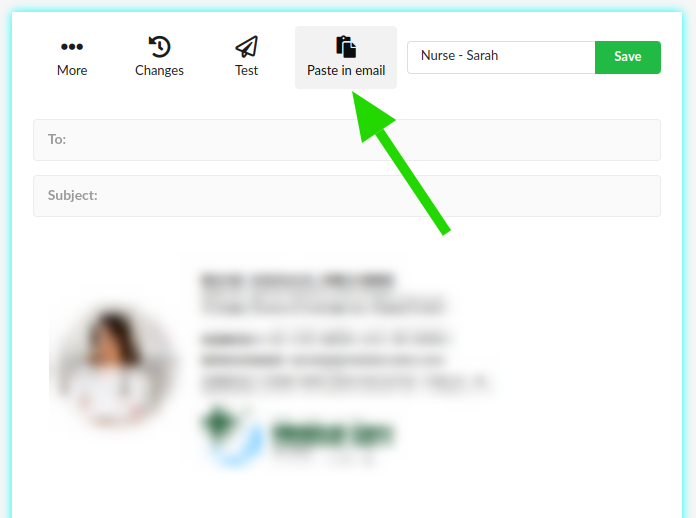
Follow the specific instructions of your email client to paste the signature. Bybrand provides tutorials for popular email clients:
- Gmail – How to add an email signature;
- How to add a signature to Outlook.com;
- How to add a signature to Yahoo! Mail;
Complete video tutorial
This video tutorial will show you how to create your first professional email signature. A company logo could also replace that face photo if it suits you.
If you require any clarification or difficulties, please contact our support team via email or chat.
