This post is also available in: Português Español Deutsch Français Italiano
Adding an email signature to Mac Mail is an excellent way to improve your communications and grow your brand. Although it may seem simple, the right email signature can add a lot of value to your email messages.
Any Apple email clients trying to figure out how to add an HTML signature need to know that the process is actually effortless. With the right signature generator, you can effortlessly create a professional signature and add it to your Apple device.
Follow this guide to learn how.
Why are email signatures for Apple Mail important?
Adding an email signature to your Apple Mail account can have many essential benefits. Email signatures enhance your communications and help to enforce your brand.
They display essential information for your email recipients – like contact details, social media links, or a link to your website. These elements can help you promote your brand, as well as gain some useful actions from your email contacts – like driving traffic to your website.
When you add a signature to your emails, you can put helpful information in them. This could include things like an appointment calendar to set up a meeting with you, a link promoting an event, or sharing an important piece of content in your email signature. These elements help you use your email signature for marketing.
Here is an example of an email signature with clickable links.
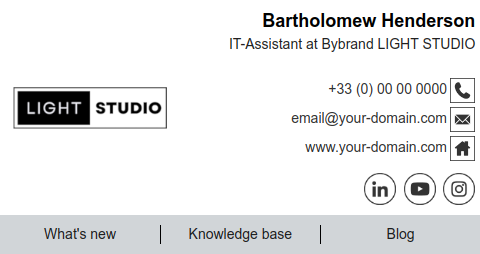
The great thing about using an HTML email signature is that it can be interactive. You can create a professional signature and add hyperlinks over things like your company logo, social media icons, and more. Your email signature is no longer just informative, but it can include CTAs and help you achieve a purpose.
With the right email signature generator, creating a professional email signature and adding it to your Apple mail account is super easy. Once you’ve set this in place, you can enjoy a whole new world of benefits from your email communications.
3 Steps to add an HTML signature to Apple Mail
Adding a new signature to your email account may seem like a complex task if you’ve never done it before, but it’s actually super simple.
You don’t need to know how to write HTML code or have any technical or design knowledge. You just need the right tool to create signatures for you.
Here are the steps you can follow to add an HTML signature to your Apple Mail email account.
1. Create an email signature
First, you’ll need to create the signature that you’re going to add to your email account. This includes creating the signature design and accessing the HTML file.
You can easily do this with an email signature generator like Bybrand. All you need to do is choose a template that you’d like to use for your email account, and customize it with your own details.
Simply drag and drop in the editor to change the images and move around the design. Update your contact information, insert your website URL, and add any hyperlinks you want to include in the signature.
Video example: Creating your first professional email signature.
Once you have created this, you can click on the “Copy Signature” button. This will copy over the rendered signature to your clipboard.
2. Add the signature file in Apple Mail
Now it’s time to add your signature to your Mac Mail account. To do this, open your email app and select the “Preferences” option.
A pop-up menu will appear, and you can click “Signatures“. Then click on the (+) icon to add a new signature.
You will now see a text area. Simply paste your signature into this section. Now you should be able to see a copy of the signature you created in the Bybrand editor.
You could also choose to set a default signature for when you create a new message. To do this, just select the item from the lower dropdown box.
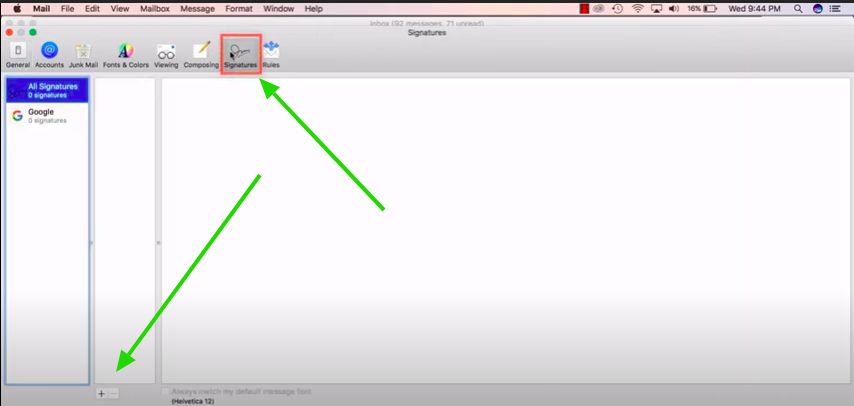
Save your signature and close the window.
3. Test your new signature
Now all you need to do is test if your HTML signature is working.
To complete this, simply create a new message and see if your signature appears – which it should. You can always send a test email to yourself or a friend to ensure all of the elements load and work correctly.
Success! You have created and added a signature to your Apple email client.
Manually add an HTML signature
Having your signature automatically added to Apple Mail using the process above is by far the easiest solution. However, if you don’t automatically add one with a signature generator, you can manually add the HTML code from a free email signature generator to Mac Mail.
Note that for 1 or 3 employees, the step below may be an easy task. However, for many employees using the Mac Mail app, you’ll want to use a method to add the signature automatically – skip to the next step.
To do this, you’ll need to follow these steps or watch this video tutorial.
- Create an HTML signature and generate the HTML file
- Go to “Preferences” and select the “Signatures” tab on the pop-up menu
- Choose which account you’re creating the signature for
- Select the (+) icon
- Add a signature name
- Close Mac Mail completely
- Open Finder and select “Go“
- On the drop-down menu, go to “Library”
- Find your Mail folder, and you’ll see a folder labeled according to your OS version (eg. V8)
- In this folder, go to “MailData”
- Then go to the “Signatures” folder
- Select the signature file you created earlier in Mac Mail and open it with a text editor
- Now you’ll see the HTML code for a signature. Paste the code for the HTML signature you created over the code in this file.
- At the top of the window, click on the arrow to access the drop-down menu. Check the “Locked” box so that Apple doesn’t overwrite your custom HTML signature code.
- Close the file and open Apple Mail.
- Create a new email, and you’ll see your new email signature in the email.
Automatic signatures for Mac Mail users
Alternatively, you can bulk-send signatures to Mac Mail users. Using Bybrand’s manager and Bulk-send feature, you can select a group of users using Mac Mail and send individual instructions to each. Finally, each employee can manually paste the signature using the above step.
This Bulk-send (video tutorial) method saves a lot of time managing email signatures for a large team.
Tips for adding an email signature to Mac Mail
Adding email signatures to your email account is actually effortless. To help you make the most of your signature, here are a few important tips and tactics to keep in mind.
Keep it simple
While there’s a lot you can achieve with your email signatures, it’s important not to overcomplicate the signature. When you edit signatures, try not to add too much information or too many elements. This could complicate the recipient.
Instead, create minimalist signatures that only include the necessary information, like your job title, company logo or an image of yourself, contact details, etc.

Keep signatures consistent across your organization
Using email signatures across your entire company is a great idea, but this only works if you’re able to maintain consistency across these emails.
The best way to do this is to use a company-wide email signature management tool. This makes it a lot easier to create, manage and update email signatures for an entire organization.
Use the right image size
Unfortunately, Apple Mail doesn’t support image size settings via HTML. This means you’ll need to crop the image in your signature to be the exact size you need.
The good news is that using a signature editor like Bybrand lets you access a feature where you can facilitate the exact crop size. This makes it easy to ensure your images and logo are displayed properly.
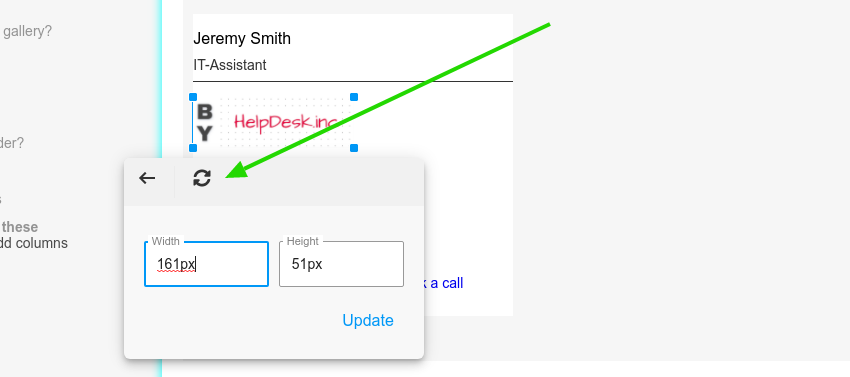
See also: How to crop an image to the exact size for Mac Mail?
HTML signature in Mac Mail not working
If you’re having trouble adding an HTML email signature in the Mail app, this video tutorial will solve the problem. Easy setup guides signature pasting and resolves Mac Mail compatibility issue when opening an HTML signature. When finished, your HTML signature does not appear deformed.
Furthermore, if you are having trouble displaying images in your email signature for Apple Mail, below are 2 potential problems.
1. Remote content not loading

2. Not using Rich Text Format
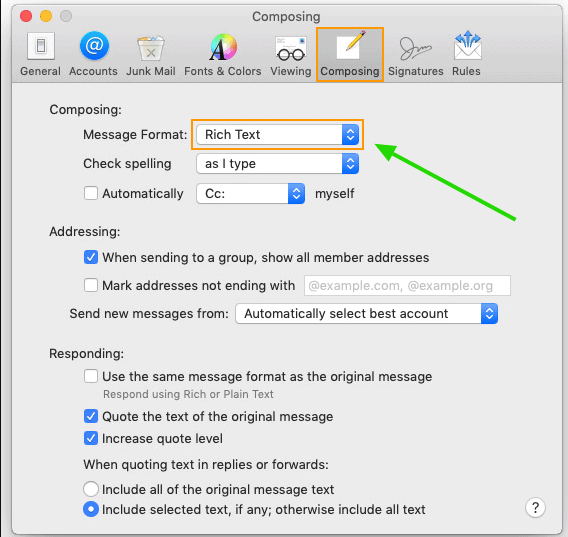
Read more in How to fix images not showing in Apple Mail email signature.
Professional email signature examples for Mac Mail
The simplest Mac Mail signature example is adding your name, title, and contact information to the end of emails. In addition, you can add your company logo, brand colors, and other branding elements, such as quotes or website links.
No matter your professional email signature type, it’s important to use it consistently in all your emails. So, to make sure your Mac Mail HTML signature looks professional, here are some templates to help you get started:


Conclusion
Using an email signature generator to add an HTML signature to Mac Mail is a much more straightforward process than manually adding one. It’s also best if you want to add HTML email signatures for Mac Mail across your team or company.
Once your expected signature is in place, you’ll be able to reap many new benefits from your email communications. This could include driving more traffic to your site, gaining social media followers, or simply adding more context to your emails and making them feel more professional.
The templates above can do that for you.
Still, confused about how you can automatically add an email signature to your Apple Mail?

Create your first email signature with Bybrand
Bybrand offers the ability to generate, administer, and distribute essential email signatures for your employees.
