This post is also available in: Português
Having individualized email signatures for Outlook is a powerful way to enhance your brand’s identity, ensure a professional look, and provide recipients with vital information about you or your business. Whether you use any Outlook program, be it webmail, desktop or mobile, creating a compelling email signature is a simple process.
This guide will walk you through step-by-step instructions on creating, customizing, and managing your email signatures in Outlook, along with showcasing five great examples for inspiration.
Email signature creation: An overview
We’ve already written a lot about email signatures here, so we won’t be repetitive again. But, the key to a successful HTML email signature is to keep it simple, informative, and visually consistent with your brand.
So, here have where you can get additional information on how to create a perfect professional email signature:
- Best practices for business email signatures
- Complete guide to HTML email signatures
- Why you should add a logo to your email signature
Five great examples of email signature for Outlook
These examples will inspire you to create an email signature that resonates with your audience in Outlook, whether you’re a freelancer, an entrepreneur, or a corporate with many employees.
Basic Professional Signature
This signature includes your name, job title, company name, and contact information. It’s simple, clean, and professional.

Signature with Social Media Links
This signature includes not only your contact information, but also links to your social media profiles.

Alternatively, you can have a QR-code image in the signature for a user action + with social media links.

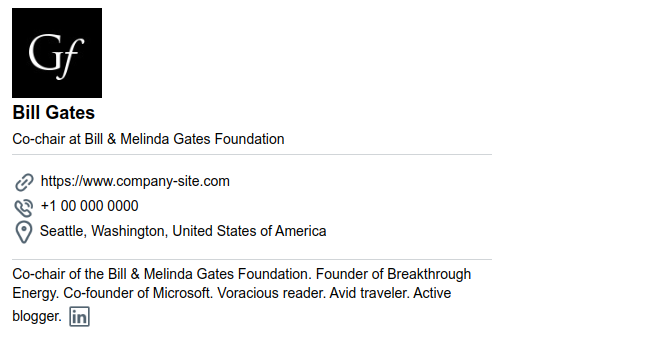
Signature with a Company Logo
Including your company’s logo in your signature can enhance brand recognition and improve the visual.
Signature with a Call to Action
A call to action, such as “Schedule a Meeting” or “Visit Our Website”, can encourage recipients to engage further with your brand.

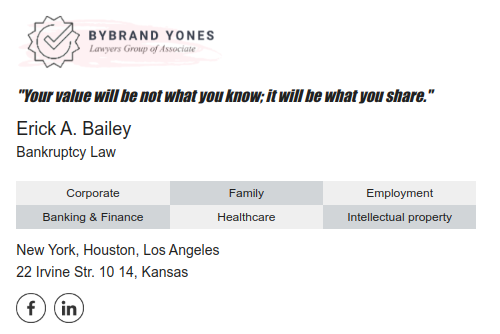
Signature with a Personal Slogan or Quote:
A personal slogan or favorite quote can add a personal touch to your signature and make it more memorable.
Complement:
Crafting an email signature in Outlook desktop version
Creating an email signature in Outlook’s desktop version is straightforward. If you don’t have time to read the step by step, you can watch this video tutorial for Microsoft Outlook 365.
Step 1: Opening the signature area
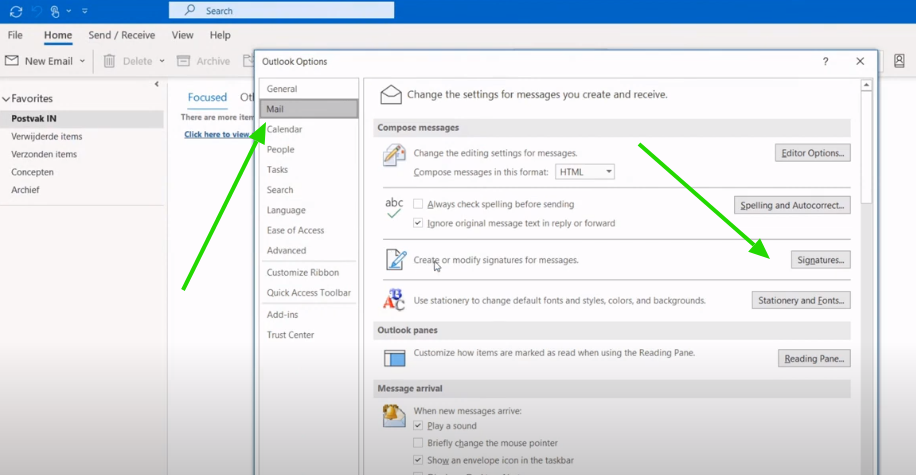
With Outlook open, navigate to File, and click on the Options menu. Then, click on Mail, and then on the Signatures section. Similar to this image.
Step 2: Adding a new signature
Once the in-app signature editor opens, click on the New button to create a new signature. Add a unique name to this signature, especially if you understand creating multiple signatures in the future.
Step 3: Entering signature information
In the signature editor, enter your full name, job title, contact information, and any other pertinent details. Now, you can create a simple, text-based signature.
Step 4: Formatting the signature
Outlook allows you to format your signature using standard editing options. You can adjust the font type, size, color, and alignment to match your brand’s aesthetic. Remember to maintain a visual hierarchy by using different font sizes or colors for essential information.
Adding a signature in Outlook 365 webmail
The steps for creating an email signature in the Outlook webmail are similar to those for the desktop version. However, you’ll need to sign in to Outlook.com and open the Outlook tab to access the settings.
Again, a quick video tutorial with steps:
Step 1: Accessing settings
Once you’re in Outlook, click on the settings gear icon located in the top right corner of the window. Then, visit View All Outlook settings and select the corresponding option in menu – Mail – Compose and Reply.
Step 2: Composing your signature
In the email signature box, type your desired signature. You can format the signature using the mini formatting bar, adjusting fonts, colors, sizes, and text alignment as needed.
Step 3: Saving your signature
Once you’re satisfied with your signature, click on Save. Your new signature will now automatically appear at the bottom of every new email message.
Adding an email signature in Outlook for Mac
For Mac users, the process of creating an Outlook signature involves a few different steps. Here’s how to do it:
Step 1: Accessing the preferences menu
Open Outlook and navigate to the Preferences menu. You can access this by clicking File > Preferences or by pressing the Command + Comma keys.
Step 2: Opening the signatures window
In the Preferences menu, click on “Signatures”. This will open the Signatures window where you can create and manage your email signatures.
Step 3: Creating a new signature
Click on the “+” sign near the Edit Signature window to create a new signature. By default, the signature will be named “Untitled”. Click on this name to rename your signature.
Step 4: Entering signature information
Type your desired signature details in the Signature box provided. This typically includes your name, job title, contact information, and any other information you wish to include.
Step 5: Customizing signature settings
In the Choose default signature section, customize your signature settings as desired. You can associate a specific signature with a certain email account, or set a signature to appear in new messages or emails you reply to or forward.
Similar to this image:

Step 6: Saving your signature
Click the “X” button to close the window and save your new signature. Now, when you compose a new email, your signature will automatically appear at the bottom of the message.
Setting up an email signature in Outlook mobile
While it would be ideal to have your mobile email signature match your desktop email signature, unfortunately, Outlook mobile apps don’t support the HTML email signature or image additions. The best option is to create a text-based signature that mirrors your desktop signature as closely as possible.
To add an email signature in the Outlook mobile app, follow these steps:
Step 1: Opening Outlook settings
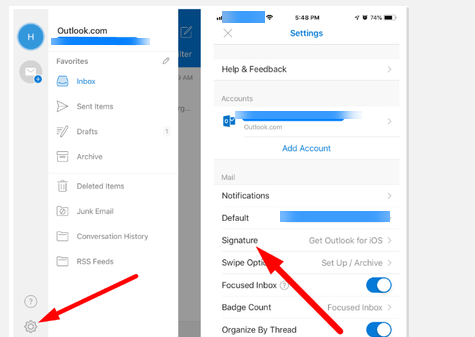
Launch the Outlook mobile app and tap your account image in the top left corner. Then, tap the settings gear icon at the bottom left to access the Outlook settings.
Step 2: Accessing signature settings
Scroll down in the settings menu and tap Signature. By default, the signature will suggest “Get Outlook for Android” or “Get Outlook for iOS”, depending on your device.
Step 3: Editing your signature
Tap “Signature” and clear the default message field. Type in your name and / or contact information, and tap the checkmark on Android. For iOS, the signature will save automatically.
The limitations and the solution
The Outlook signature area provides options for creating email signatures, it does have limitations. For example, the editing options are basic, and certain features—like creating multiple signatures or syncing mobile and desktop signatures—are not supported (at least at the time of publication of this article.).
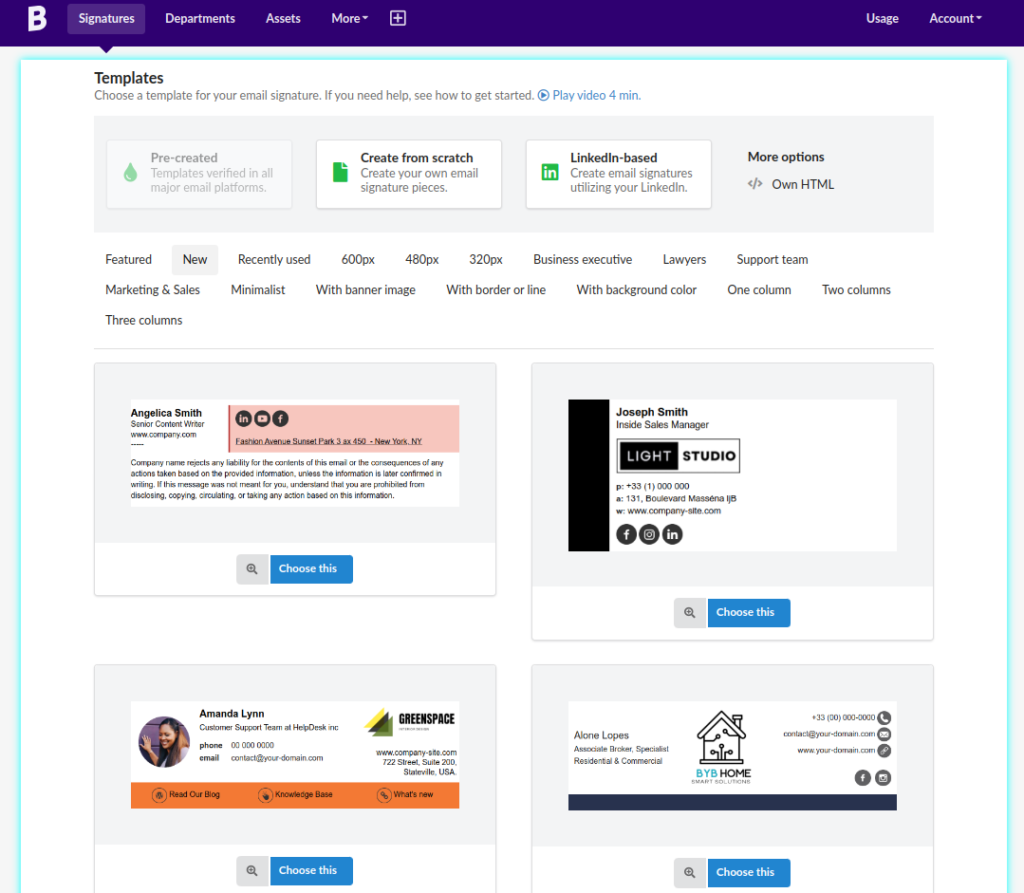
To overcome these limitations, consider using email signature generator tools. These programs provide pre-built templates and advanced editing capabilities, allowing you to create professional and visually appealing email signatures effortlessly for any organization.
Wrapping up
Creating effective email signatures for Outlook is an essential skill for professionals. It not only enhances the professional appearance of your emails, but also provides recipients with important information and encourages further engagement.
By understanding how to create, customize, and manage your email signatures in Outlook, you can ensure your email communications leave a lasting impression.

Create your first email signature with Bybrand
Bybrand offers the ability to generate, administer, and distribute essential email signatures for your employees.
