This post is also available in: Português
Are you looking for a simple but effective way to promote your business and make it easier for your customers to find you? A Google Maps banner is a great way to drive traffic to your business!
In this article, we’ll guide you through the process of adding a Google Maps banner to your email signature using Bybrand. Then, you will learn some best practices to optimize its effectiveness.
Table of contents
Benefits of adding Google Maps to your email signature
Adding a Google Maps banner to your business email signature offers a few key benefits.
First, it can help drive traffic to your business location through your employees’ email signatures. By including a clickable map in your email signature, you provide a convenient way for your clients and customers to locate your business with just a few clicks.
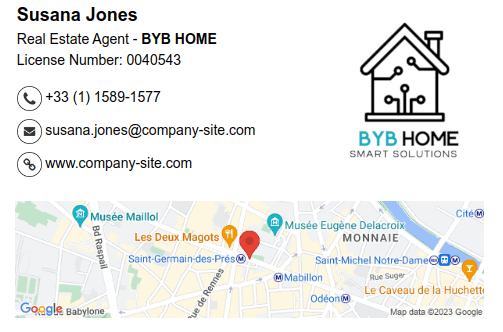
Email signature example with Google Maps:

Not only does this make it easier for people to find you, but it’s also an effective promotional tool. Imagine if all of your employees used a Google Maps banner in their email signature – every email they send becomes a mini advertisement for your business!
Adding Google Maps to your email signature can also help build trust with your customers. When people can easily find your business, it shows your transparency and accessibility. This makes your business seem more trustworthy.
To top it all off, adding a Google Maps banner to your email signature is a simple as can be. It only takes a few clicks to add a map – no coding knowledge or design skills needed. Most email clients, such as Gmail and Outlook, allow you to add a clickable map image to your signature with ease.
Adding a Google Maps banner to your signature is a breeze with Bybrand. Everything from creating a new Bybrand account to exporting your email signature with a Google Maps banner only takes 5 simple steps. Here’s how to do it:
Step #1: Sign up for Bybrand and create a new email signature
If you haven’t already, sign up for a Bybrand account and create a new email signature. You can choose from a variety of templates and customize the design to match your brand.
Once you’ve created your email signature, navigate to the Assets section in Bybrand. Here, you will be able to add and edit the content of your signature.

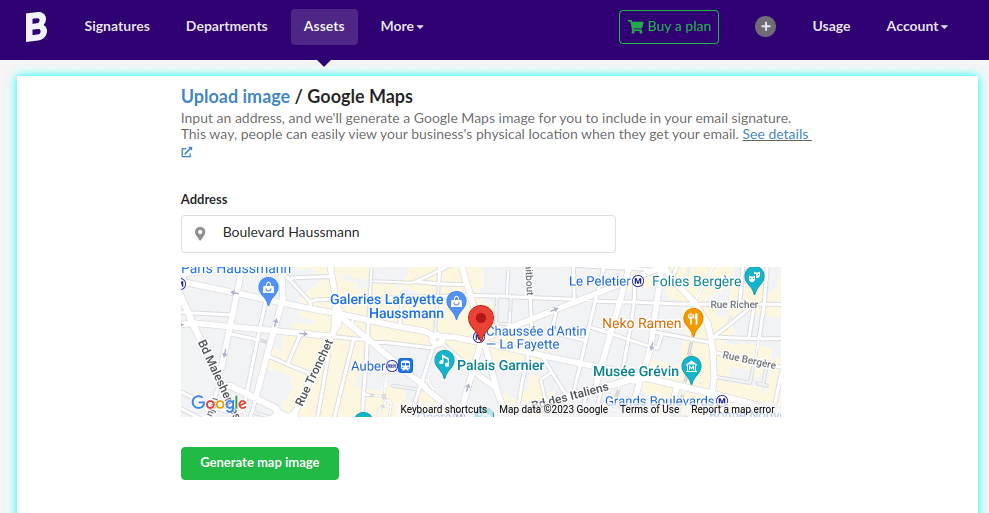
To add a Google Maps banner, click on the Image icon in the toolbar and select Add Image. Next, click on the Google Maps tab and enter your business address in the search bar. Bybrand will generate a map image with your business location.
You can customize your Google Maps banner by adjusting the size, zoom level, and even the map type. You can even go a step further and customize the marker on Google Maps.
Step #5: Save and export your signature
Once you’re happy with your Google Maps banner, save your email signature and export it to your email client. Bybrand supports a variety of email clients, including Gmail, Outlook, and Apple Mail.
If you prefer, you can watch this video tutorial on YouTube.
Best practices for maximizing the effectiveness of Google Maps in a signature
There are some best practices to keep in mind when adding a Google Maps banner to your business email signature to maximize its effectiveness. Here are a few tips:
While having a Google Maps banner in your email signature can be helpful, it’s important to make it as easy as possible for your customers to find your business location. A clickable banner can lead the customer to your location on Google Maps or a landing page with your address and directions.
- Read also: How to add links in an HTML email signature?
When it comes to the size of your Google Maps banner, less is more. While the recommended size remains around 600 pixels wide, you also need to consider your target audience.
If your audience usually opens emails on a mobile device, a banner under 400 pixels wide fits most smartphones. However, if your audience always opens emails using a desktop, you can go as large as 700 pixels wide.
- Read also: What is the best email signature size?
Lastly, it’s a good idea to add your Google Maps banner to the footer of your email signature. This ensures that it doesn’t take away from the main content of your email and is always visible to your recipients. Adding it to the footer also makes it look more professional and streamlined.
By seeing how other businesses are using this feature, you can get a better understanding of how it can work for you. Let’s take a look at a few examples that showcase the best practices for incorporating Google Maps into your email signature.
The first email signature idea with Google Maps is with a banner at the header. This is a great way to highlight your location and make it easy to find your address quickly.

The second example uses the traditional method of placing the Google Maps banner in the email signature footer. This is a professional way to include complementary and important information for your business.

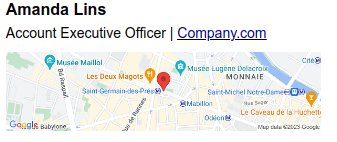
The minimalist email signature with Google Maps offers many benefits to anyone who uses it. With this option, users can easily find their way to the location or check the distance from the address to your physical store.

Final thoughts
Adding a Google Maps banner to your business email signature is a simple but effective way to promote your business and help customers find you. By following a few key best practices, you can maximize its effectiveness and make it a valuable addition to your email communications.
Thanks to tools like Bybrand, adding a Google Maps banner to your email signature is easier than ever. By incorporating this feature into your email signature, you can drive traffic to your location and make it easier for your customers to do business with you. Why not give it a try? Your customers will thank you for it!

Create your first email signature with Bybrand
Bybrand offers the ability to generate, administer, and distribute essential email signatures for your employees.